
Fairy Forest: Photographing Synchronous Fireflies

Hello friends.
I recently took a trip down to Great Smoky Mountains National Park for a very special reason.
The synchronous firefly event is a mesmerizing natural phenomenon that occurs annually for a short period of time. It involves the synchronized flashing of thousands of fireflies, creating a stunning display of lights in the park. The synchronous fireflies, scientifically known as Photinus carolinus, are a unique species of firefly found primarily in the eastern United States, including the Great Smoky Mountains region. What makes them special is their ability to synchronize their flashing patterns. During their mating season, which typically takes place in late May to mid-June, the male fireflies use bioluminescence to emit distinctive light patterns. These patterns vary from species to species and are used as a way for males and females to recognize and communicate with each other.
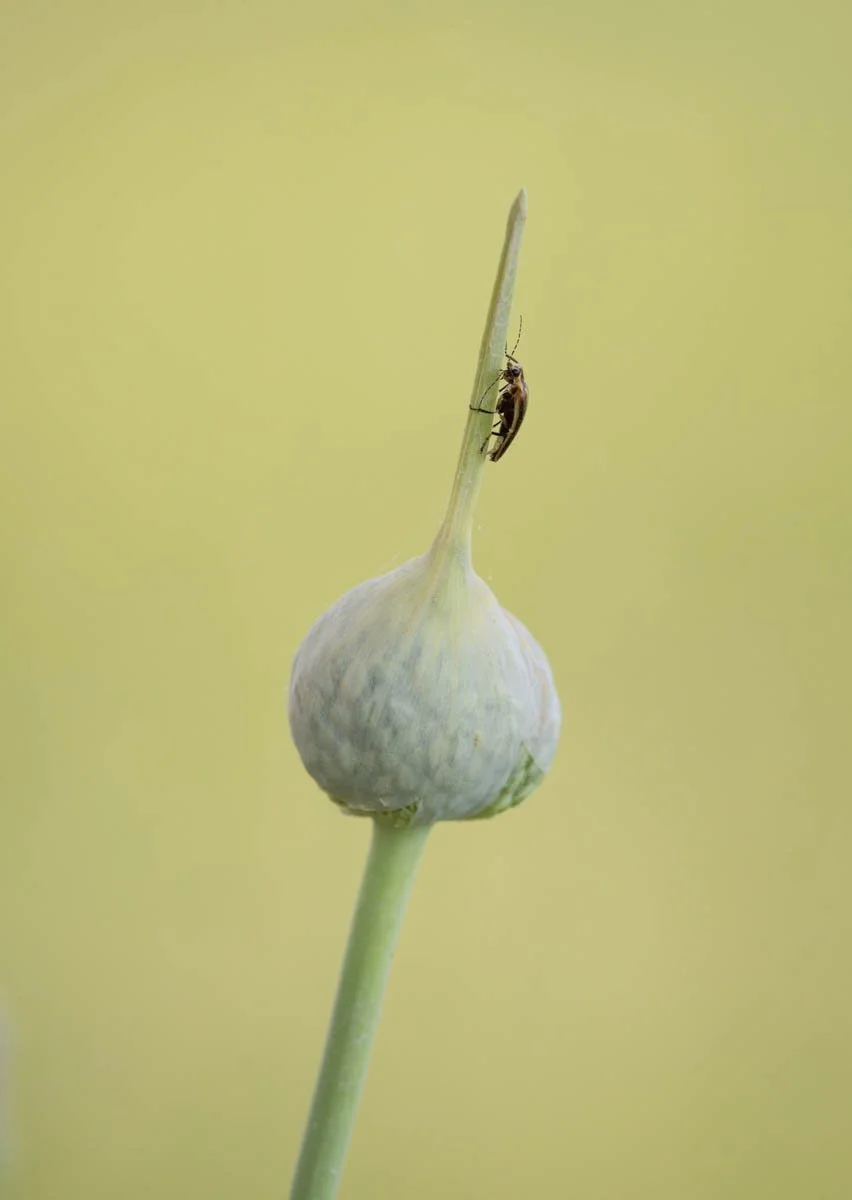
Firefly resting on wild leek (Allium sp.)
In the case of synchronous fireflies, the males flash their lights in a synchronized manner, creating a dazzling display of light that appears as waves or cascades moving through the forest. This synchronized flashing behavior is believed to be a mechanism for attracting mates. The females, perched on the ground or low vegetation, respond to the males' light patterns with their own pattern of stationary light signals.
The display of synchronous fireflies is a highly sought-after experience for nature enthusiasts and visitors to Great Smoky Mountains National Park. To witness this phenomenon, the park organizes a lottery-based system for obtaining parking passes during the peak season. The lottery aims to manage the number of visitors and minimize the impact on the fireflies' habitat. Visitors are required to follow specific guidelines to ensure the well-being of the fireflies and their habitat. These guidelines include restrictions on flash photography, the use of artificial lights, and loud noises that could disturb the fireflies.
It's important to note that the exact timing and duration of the synchronous firefly event can vary each year and is dependent on many factors, including weather conditions and the specific life cycle of the fireflies. Therefore, it is advisable to check with the park authorities or visit their website for the most up-to-date information if you're planning to witness this magical event in Great Smoky Mountains National Park.
I attended the event for the first time this year, and naturally I wanted to try to photograph it. I am not generally a night or low-light photographer at all, so this was an entirely new realm of photography for me, but I did my research and came up with a plan. Photographing the fireflies was such a wonderful and magical experience, which is why I want to share a step-by-step guide on how I went about capturing these beautiful creatures in photographs:
General Information
Location: In GSMNP, the rangers and event staff will guide you in terms of the best locations to see them. Currently, viewing is focused along two trails - Little River Trail and Jake’s Creek Trail, both directly adjacent to the Elkmont campground. Obviously, there are other options for those willing to do their research, but as a first-timer, and since I was attending with friends, I went with these two trails. Elevation is an important factor - the further you walk away from the trail head, the higher up you get, and with increased elevation, the firefly activity is reduced… so don’t go too far. Again, this is a research opportunity for those who want to get away from the crowds. In terms of what to look for when you get there, try to find areas of the forest that have a clear mid-storey, and a closed canopy, since this is what the fireflies dig the most. I also sought out pleasing compositions - I specifically wanted some structure, pattern, and repetition in my images.
Timing: As mentioned above, Fireflies are most active during specific times of the year, usually during the summer months. The official event is scheduled based on the peak viewing week, and since this varies from year to year, it is announced about a month out. But it’s not as though the fireflies start flashing at the beginning of the week and stop at the end! So there is leeway in either direction. Viewing before or after the peak week is likely a good way to avoid some of the crowds… In terms of time of day, they generally begin their light show about 30 minutes after sunset. This all shook out to around 9:30pm. The show lasts for about 2 hours, with peak flashing about half way through.
Gear
Prepare the following equipment before heading out:
Camera: A DSLR or mirrorless camera with manual controls is critical (phone cameras just won’t cut it for this). IMPORTANT SIDE NOTE: You need to disable or cover all flashing lights on your camera ahead of time. Lights disturb the fireflies and the other visitors, so you definitely need to ensure you aren’t flashing, shining, strobing, or emitting light in any way. I closed my LCD, and covered the light sources on the exterior of the camera body by wrapping a cloth headband around it all. Another friend used duct tape.
Lens: A wide-angle lens with a low aperture (f/2.8 or lower) is ideal for capturing the fireflies and the surrounding environment. I used my Canon RF 24-70mm f/2.8.
Batteries: Make sure you have a fully charged battery in your camera, and a fully charged backup. This is an energy intensive activity, for you and the fireflies!
Tripod: A stable tripod is crucial for long exposures.
Remote shutter release: This will help avoid any camera shake when pressing the shutter button. Alternatively, just use the 2 second timer.
Camp chair: You’re going to be in the woods for a good long while, especially if you arrive early. Bring a chair. Once I started shooting, I stood the entire time, but I was glad to have the chair in the lead up to the shoot.
Light source: Use a red headlamp or flashlight in the dark, but only when absolutely necessary. By the time it’s all over, it is absolutely pitch black, so a light is necessary for a safe exit down the trail. But do your utmost to avoid using light at any other time as it is a nuisance, and it affects the firefly flash patterns.
Technical Plan
You need to decide on your technical plan before the event. There are a number of different approaches to capturing these little fellas, ranging from many individual exposures of 30 seconds each which are stacked in Photoshop after the fact, to a single exposure of 10-30 minutes in length or more. I chose the former, primarily for the purpose of maintaining control.
Using many separate exposures affords a lot more control in terms of the look of your final image. You can pick and choose which exposures to include or exclude, based perhaps on the trails and patterns left by the fireflies, or based on the ambient light pollution which is inevitable in a crowd. I knew I was going to be shooting around people, and I expected that there would be more than a few instances where someone shined a light into my scene whilst I was exposing (and I was spot on with this - I have many frames that show red light reflected off the trees in my scene that I had to exclude in my final composite, see below). If I had chosen to do a single exposure of say 30 minutes, and someone shined a light near the end of my exposure, my shot would likely have been compromised. So I threw my hat in the multiple exposure ring.
Here are the steps I took on site along with the settings I chose and the reasons for each.
Compose the scene, and then do not move your camera for the rest of the evening. You’re going for a single final image here. Be intentional with how you frame the trees, water, or grass to add depth and context to your photo.
Set the camera to manual mode to give full control over the exposure settings.
Turn off image stabilization: If your lens or camera has image stabilization, turn it off when using a tripod to avoid potential interference.
Base Image
Adjust the ISO: Start with a low ISO setting (e.g., ISO 200) to minimize noise in the image.
Set the aperture to maximize depth of field and then set the focus using the hyperfocal technique. I went with f/11 in my instance but it will depend on the depth in your composition.
Take any moving vegetation into account here. Adjust the settings accordingly to freeze any motion for now.
Shoot a base image before it gets dark but make sure it is well after the sun drops low. This is the forest stage upon which the fireflies will glow! There should be no bright spots in your scene. Your exposure can be much brighter than you intend for your final image in order to maximize file quality/minimize noise, just be sure not to blow out any highlights.
Firefly Images
Wait for the darkness and the light show to begin, and as you wait, change your settings for the next series of images.
Use manual focus: Switch to manual focus and set the focus to infinity or focus on a distant object. I played with both, since I specifically wanted to capture the little bokeh balls in my foreground.
Open the aperture: Use a wide aperture (e.g., f/2.8) to allow as much light into the camera as possible. I used f/2.8.
Adjust the ISO: dial it up significantly higher to increase your camera’s sensitivity to light. I went with ISO 1600, which is a good balance between light sensitivity and noise for my particular camera. You can experiment here. I just set it at 1600 and left it.
Set a long shutter speed: Since fireflies emit a soft glow, longer exposures are necessary to capture their light trails. I went with 30 seconds because honestly I’m lazy. Setting it at 30 seconds meant I would have to release the shutter less often over the course of the event…
Set 2 second timer to eliminate camera movement when pressing the shutter. You could also use a remote release.
Once the show starts, begin exposing, one after another. I tried to accommodate the timing of the synchronized flashing, beginning my exposure at the end of their short rest periods. I also tried to make sure my shutter was open for any close up fireflies that were flying close to my camera - again, I was trying for the bokeh balls. You can play around with this.
Here are some of the images from my image sets.

This first one is from our first shoot on Little River trail, and it shows a base image with light still in the forest. This is well before darkness. you can see a couple of the little bokeh balls here, too. I believe this is a different species of firefly, as it starts flashing earlier. Because the shutter is open for less time because the forest is brighter, and I’ve focused in the distance, these fireflies show up as stationary and out of focus, and I love this effect!

The second image is from along Jake’s Creek, our second shoot, and someone shone their red light directly into my scene giving the trees a very eery glow! I discarded shots like this as I wanted a very natural looking final result.

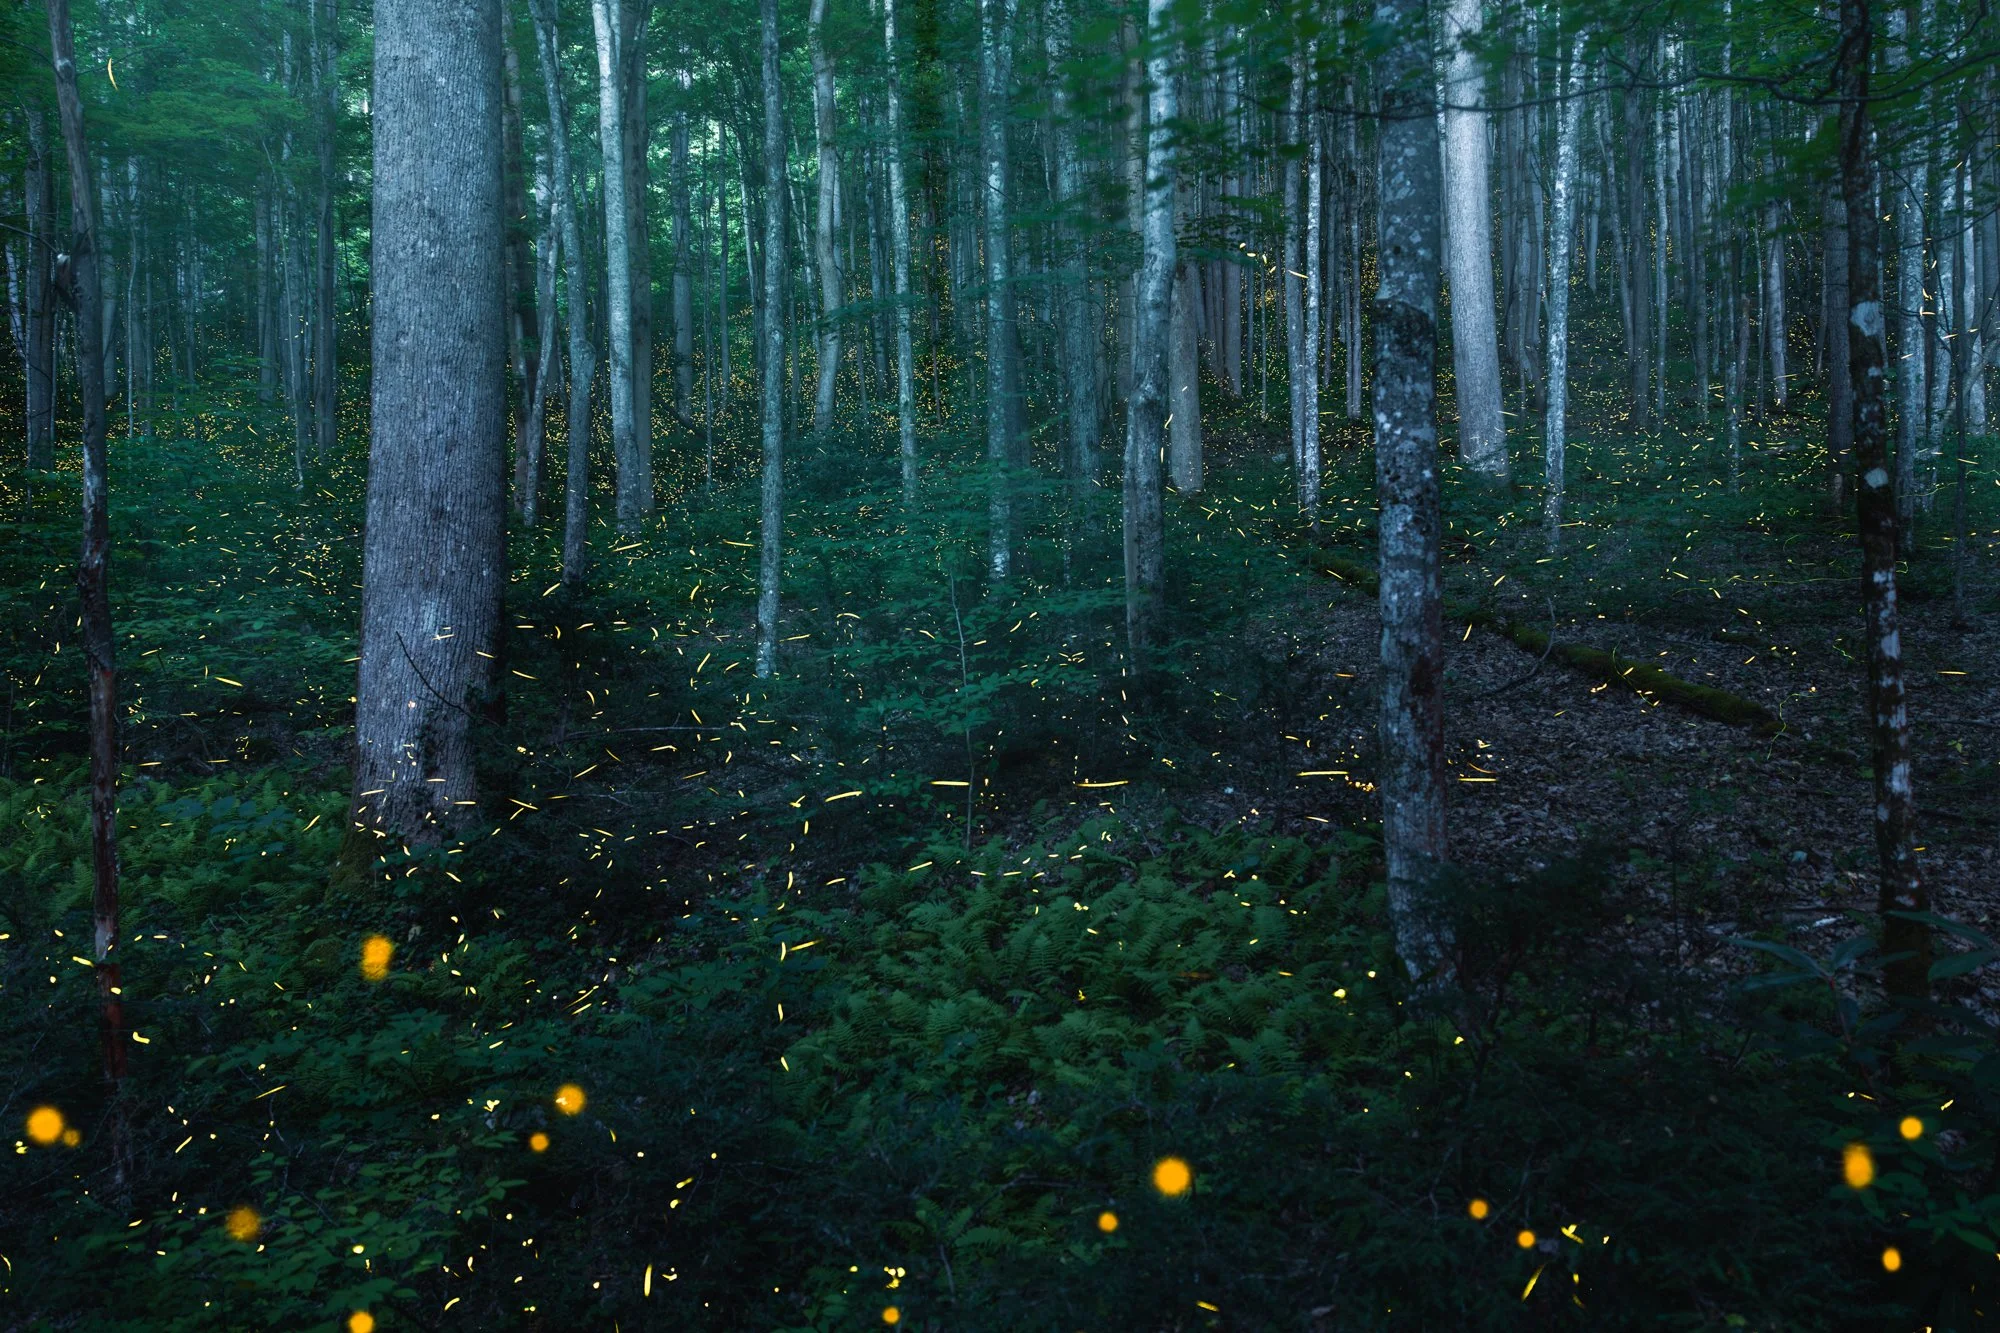
This last image is just one of many firefly images. Here, you can see the light trails very clearly. I made sure to choose these sorts of images for my final composite, and maybe skipped over images with less distinct patterns.
Post-Processing
I begin all my post-processing in Lightroom. Start by reviewing the image sets and selecting images to include and exclude. You need a base image and then as many firefly images as you like. I used 30-50 images for each one of my final two images. I like to work my through each series, flagging the frames I like in Lightroom.
Process your base image of the forest stage in Lightroom and/or Photoshop. Don’t crop it yet, though. To me, this is the trickiest part of the post-processing. Long exposures and night scenes can introduce all sorts of color casts, and I struggled to find a color balance that felt appropriate. There can be some really strong blues, and even purple/magenta, so take your time to get this just how you like it.
Once you’re happy with your base image, select it and all of your flagged firefly images, right click and choose open as layers in Photoshop.
Make sure your base image is at the bottom of your stack.
Select all the firefly layers, so everything except your base image, and then set your blend mode to LIGHTEN. This is where the magic appears - all the firefly trails will now show on your forest stage!
You can use layer masks to adjust what is shown from each layer (I didn’t do this, it’s too finicky for me). Once you like everything, either merge all the firefly layers into one or Stamp/Merge Visible into a new layer.
From here, I use adjustment layers and clipping masks to fine tune the relative luminance of the base layer and the firefly layer. It’s a bit of a dance to make the forest dark but still interesting, and the fireflies nice and bright so they glow and show contrast on your base image.
I made some small adjustments/enhancements to the little bokeh balls, but you can skip this if you like.
So that’s the soup-to-nuts account of my firefly experience and the making of my image Fairy Forest. I hope you found it helpful and interesting.
I am planning a return visit to photograph the fireflies next year, and intend to offer a very limited number of opportunities to attend this event with me and shoot alongside me. If you think you might be interested, make sure to sign up for my newsletter (above or below this blog post) where the announcement will be made in the coming months.
If you are interested in supporting my work as an artist and learning more from me, I am grateful to you and here are some ways for you to do that:
Purchase my ebook RIVERSONG to learn about my approaches and inspirations for specific images, and the ways in which I connect with the places I photograph.
LEARN MORE ABOUT MY MENTORING PROGRAM
Apply for my mentoring program. I am still accepting mentees at this time, but this is a very limited opportunity. Let me help you grow in your artistry, skill and vision.
DOWNLOAD MY FREE EBOOK: APPALACHIAN DREAMS
Download my FREE ebook Appalachian Dreams to learn about my journey and coming to terms with the landscape in which I live.
Or, if none of the above are a good fit, then join my subscriber family to be notified of my regular FREE learning resources.